Ever since watching the following TED talk, I had been eagerly awaiting the opportunity to play with squishy circuits.
The squishy circuits kit comes by mail and includes instructions on how to make conductive playdough and insulating playdough along with LED lights, a motor, two sound components, and a battery pack.
The conductive playdough was easy to make and all ingredients are standard household items except maybe cream of tartar.
I decided not to make the insulating playdough this time. Once you mix the ingredients, you heat the mixture on the stove until it hardens.
You are now ready to begin making circuits!
As you can see below, I did not make the insulating playdough to put in between my two strips of dough so I needed to be sure they were not touching each other in order for my circuit to work. This is why the insulating playdough is helpful to have - you can put it between the two conductive pieces of dough and then you don't have to worry about the two strips of dough touching.
To begin your circuit, you connect one strip of dough to the battery pack by way of the wire
with the positive charge (red) and you connect the other strip of dough
to the battery pack by way of the wire with the negative charge (black).
Then it's just a matter of connecting the components to the strips of dough
making sure the negative and positives wires (or metal pins for the
LEDs) go in the correct strip of dough (black to black and red to red or with LEDs - the longer metal pin represents the positive).
It was a great activity to become more familiar with how circuits work in a fun hands-on way.
Here are more pictures of squishy circuits in use created by others:
This week kicks-off our first week of 30 Minute Madness: 3D Building in the Library and Learning Commons. This is a competition held during lunch periods on Mondays, Wednesdays, and Fridays. Students join either Team A or Team B and compete using the Maker Lab materials provided.
This week the challenge is to build a structure using Strawbees and straws based on the judge's criteria. The judge for each lunch period will determine on what aspect they want to judge.
On Monday, Judge Nico was looking for the most creative design. On Wednesday, Judge Gongwer was also looking for most creative design. The winning teams won a $5.00 printing credit.
Monday's winners (with their design) during 1st lunch!
Wednesday's winner (with his design) and Judge Gongwer during 1st lunch! Josh designed a prototype for a solar panel house that would move to face the sun.
Stop by to build!
One of our most popular pieces of equipment is the Makey Makey. We purchased six of them and set up a demo at the circulation desk, where students can play the Scratch-based games or musical instruments that work with it.
A student showing how the Makey Makey works.
If you haven't seen the Makey Makey, it is an extremely fun and relatively cheap piece of equipment to have in a makerspace. By connecting one to your computer, it allows you to use conductive materials (people, coins, fruit, water, graphite pencil, etc) to control the arrow keys, space bar, click button, and other keys on your computer, by creating a circuit. The video below shows some of the fun things you can do with it.
We've even incorporated it into our campus tours, by having the students create a human band, which has been a huge hit with the visiting 8th grade classes.
Back of the Makey Makey.
But while many students have enjoyed playing with it, one student took it a step further. After trying out one of the Scratch-made piano programs, one freshmen student decided that she wanted to create a piano that included more keys. Having used Scratch previously, she was able to create a keyboard that included a full octave (with functional black keys) using the extra controls on the back of the Makey Makey (which work with the W, A, S, D, F, and G keys on the computer). Here is her program in Scratch, which we included in our Makey Makey demo:
Piano program
Happy to see students expanding on ideas/equipment they've learned about in the Maker Lab. We hope to see more projects like these in the future. Happy Making!
We were fortunate enough to have two alumni involved in the maker movement through San Francisco's Noisebridge, who stopped by to talk to our students about hackerspaces. Carl Gorringe '96 gave an overview of hackerspaces, how they differ from makerspaces, and some of the types of projects people have worked on at Noisebridge. Cristina Deptula '00 spoke about hackervism, and talked about people such as Aaron Swartz.
Gorringe '96 and Deptula '00 speaking. Photo by MCHS LLC
In addition, Bay Area-based Type A Machines co-founder R. Miloh Alexander came with his company's Series 1 printer to show off 3D printing in action.
Alexander speaking. Photo by MCHS LLC
Much larger than the Printrbot Simple Metal we have (and more expensive), but it can make objects like this:
3D printed owl. Photo by MCHS LLC.
It also printed objects a lot faster. They printed a smaller, less solid version of the owl in about 30 minutes. Our Printrbot took two and half hours to print a TARDIS (Doctor Who), as seen below:
Students were excited to see the 3D printer in action. In fact, many stayed after the bell rang for the end of school to watch it complete the owl. A great first day demoing 3D printing.
Students waiting for the owl to finish printing. Photo by MCHS LLC
Every year, we do an activity with
the 8th grader classes that come in for campus tours. The goal for our
part is to highlight our school's focus on STEM (science technology
engineering and math) or now STEAM (science technology engineering arts
and math), as well as the collaborative aspect of our school projects.
With the new maker lab, we decided to to make use of some of our
equipment, Strawbees.
Strawbees are plastic hinges of various sizes meant to fit in the ends
of straws, which can be used to build 3D objects that can move, spin,
etc. From their website:
We
gave the kids an instruction sheet, 15 bendy straws, 15 straight straws
(surprisingly hard to find), a pair of scissors and two sheets of the
Strawbees.
Supplies. Photo by MCHS LLC.
Working in teams of three or four, the students were challenged to come up with the tallest structure in 15 minutes. In addition, we had a prize for most creative, as voted by our Link Crew.
Tallest structure. Photo by MCHS LLC
Link Crew voted on the most creative structure because "it spins."
Most creative structure. Photo by MCHS LLC
The 8th grade tour group had a lot of fun building the structures, and the excitement among Link Crew suggests our current students will enjoy Strawbees as well.
I had no idea that I would enjoy sewing as much as I did! I found it therapeutic in process and I liked that I had a clear goal to achieve - make the light (LED) go on. The most difficult step for me was threading the needle and making a knot; I forgot that you actually had to tie both ends of the thread together, not make a knot on the needle itself.
Once I did that it was smooth sailing. The hoop made the sewing super easy as the felt was taut allowing me to stitch fairly quickly.
Essentially I had to do the same thing 2x - 1x connecting the 3 positive pins by way of the thread and 1x connecting the 3 negative pins by way of a SEPARATE piece of thread. When finished, add the battery and...
voila! LIGHT! This is what you will need to do to become certified in the LilyPad - you can do it!
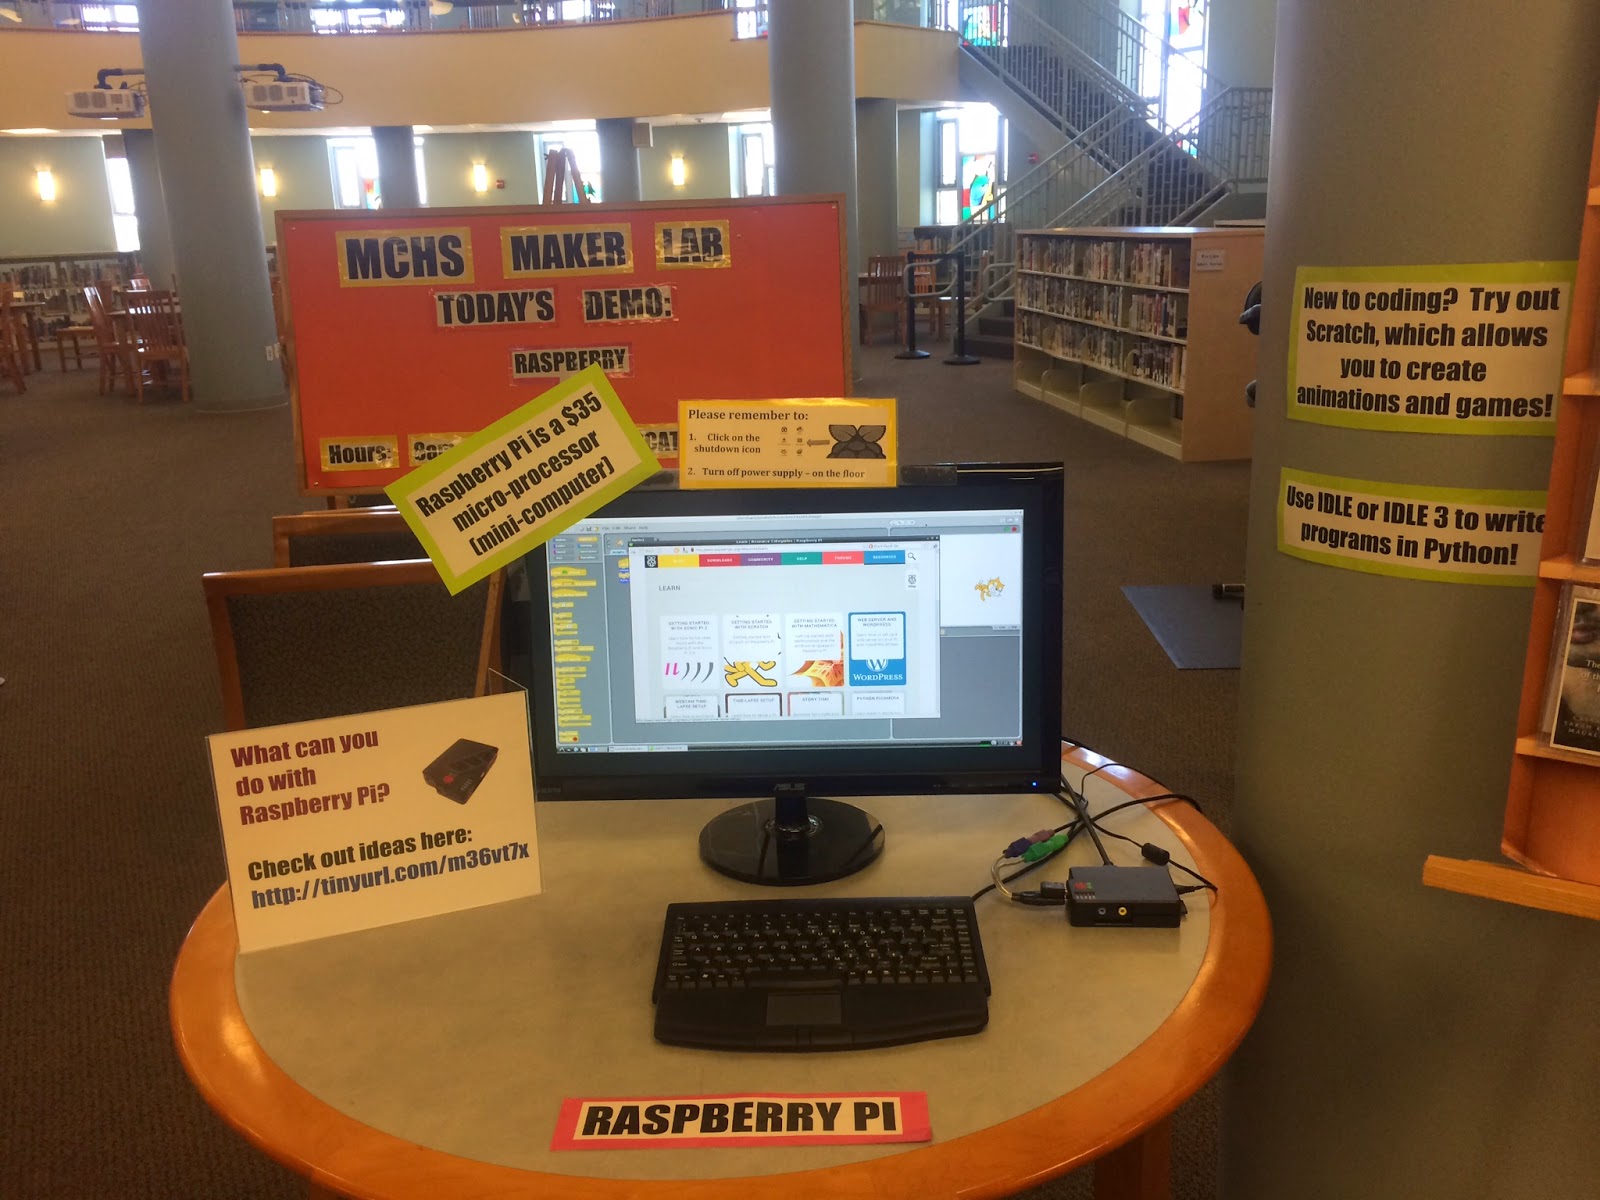
We've been demoing the Raspberry Pi all week and besides a core group of students that already own Raspberry Pis, most have the same question: "What can I do with it?"
Raspberry Pi Demo. Photo by MCHS LLC
If you're unfamiliar with Raspberry Pi, its a $35 micro-processor ("mini-computer" in the words of our Technology Director) that can be used for programming, robotics, etc. There are tons of YouTube videos of different uses for the Raspberry Pi. For example, this video provided by Adafruit Industries:
Our Maker Lab has two Raspberry Pi Model Bs (we intend to purchase a B+ next). Both are running the Linux-based Raspbian. It offers applications such as Scratch, Wolfram Mathematica ($135 value free on the Raspberry Pi), and IDLE (Python IDE). Raspbian is recommended as a starting place, however there are several other operating systems you can add here. Depending on the kit you purchase, it may come with pre-loaded microSD card.
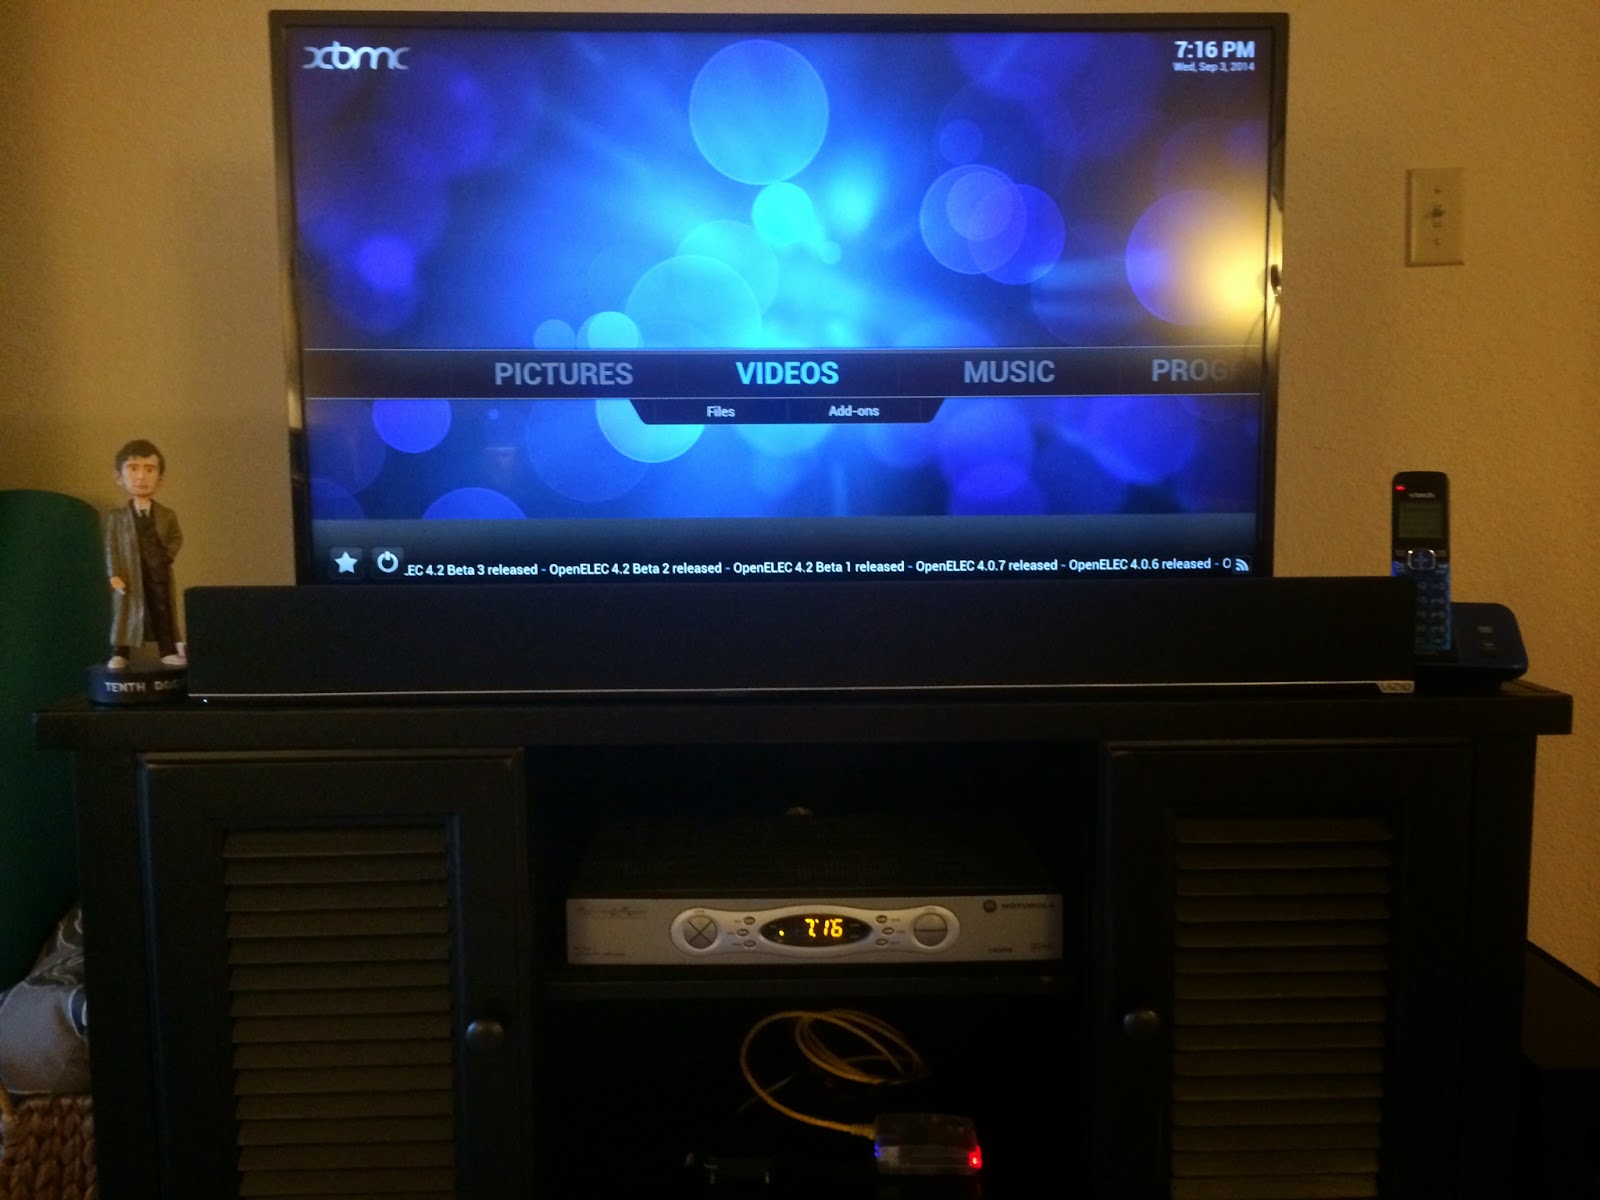
My favorite OS on the Raspberry Pi is OpenELEC, which allows you to turn your Raspberry Pi into a streaming device for your TV. If you have the XBMC Media Center (they have changed the name with the latest release to Kodi Entertainment Center) set up at your home to access all your photos, videos, music, and files across multiple computers, you can access it on your TV through OpenELEC on a Raspberry Pi. You can even download add-ons such as Pandora and other channels you find on streaming devices. Here is a video from DIY Tryin on how to add channels such as Netflix (although I have yet to try it out on a Mac):
You can also use Plex Media with the OS RasPlex. And if you're wondering if you have to control it with a mouse and keyboard, both work with a downloadable iOS and Android phone app remotes. Here is my set-up:
Raspberry Pi Model B+ running OpenELEC. Photo by MCHS LLC
With a minimal amount of work (took me about 30 minutes to set up), a Raspberry Pi running OpenELEC or RasPlex is a cheap alternative to the $99 Apple TV or Roku 3.


 You are now ready to begin making circuits!